Hi friends,
I am back with an easy DIY project!
Having too much time on my hands and plenty Mod Podge leftover, I have decided to put some of my extra scrapbooking paper to good use.
Last week I purchased a new (and very much needed) laptop and also decided to keep a small notebook to jot down passwords, tips and other PC setup steps we should all have on hand whenever we become PC challenged. So I went to my local Barnes and Noble, where I apparently am a known permanent fixture, and purchased a set of three small notebooks at $5.98 for a pack of three. I really wanted to buy the Moleskine brand, but they are just too expensive (though also coming in a 3-pack). Moleskine has fabulously smooth paper which is great for fast note takers like me, however, their pack is almost $20.00! Piccadilly, however, offers a very similar product, available in the bargain section. The paper is the same ruled cream color, only not as smooth but still of very good quality.


For this project, you will need the following items:
For my PC notebook, I picked scrapbooking paper in assorted animal prints. I planned on using the Zebra pattern for the outer cover and the Cheetah pattern for the inner flap. I had purchased these quite a long time ago and they no longer have the stickers on the back so I apologize if I am not able to tell you about the brand(s).

First, I placed my notebook directly on top of the scrapbook sheet (face down).

Fold the paper in half making a slight crease at the spine. The sheet of paper should be equally distributed on both sides

Fold the overhanging paper to form a flap against the edges of the notebook. Repeat on the other side.

Fold and form a corner with the top portion of the paper. Press hard to form a good crease, just like you would with Origami.

To split the paper at the top and form the top and bottom flaps, I simply cut a triangle shape out of the upper and lover portions of the paper. Be careful to stop your scissors exactly where the notebook begins.

Fold the top flap over.

Use the scissors to cut excess paper and ensure that the flaps are all the same size.

I used tape to secure my flaps before moving on to the other side of the notebook. Be careful not to press too hard on the tape itself as it is only there to temporarily hold the flaps onto the cover. You do not want to damage your paper in the process of removing the tape afterwards.

Once I had all my creases marked, I removed the tape and careful unfolded the paper out of the notebook.

Using my brush, I covered the entire surface of the notebook outer cover with Mod Podge...

And pressed my paper cover back into position, ensuring that all the paper was in contact with the glue.

Using the same brush and Mod Podge, I adhered the flaps onto the inner cover of the notebook, going under and making sure that I had plenty Mod Podge under and over the corners as well. Do not hesitate to apply pressure wherever needed when you see the paper coming off the cover.


For the inner cover, I cut a piece of scrapbook paper in a matching theme and color, slightly smaller than the cover itself so that the Zebra pattern could still be seen along the edges.

Using my brush and more Mod Podge, I glued the inner cover in place.

More drying time....Once the paper is dry it is time to cover the entire surface of both the inner and outer covers with more Mod Podge.

Below, I used the back of a chair to let the notebook dry. Doing it this way allowed for both the inner and outer covers to dry simultaneously.

Once your notebook is completely dry, you will notice that it has become a bit stiff. No worries, simply bend it back and forth to bring back some flexibility to the cover, it will not crack and eventually your notebook will lay flat again.
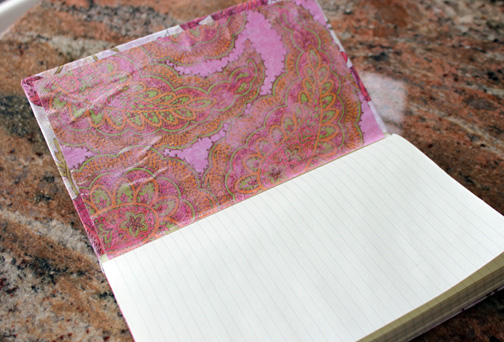
This is what my final project looks like:
I have used coordinating paint chips from the Home Depot to create tabs which I secured with transparent tape on both sides. Thus far, I have a tab for PC Setup and one for Password.s But I plan on using another one for OneNote (a software I will use but need to learn), Excel Tricks and tips, and another for troubleshooting.

Using my non bleeding LePen pens, I decorated the front page with some colorful paisley doodles. I love LePen pens, you can find them at Michael's and other craft stores. They absolutely will not bleed or show on the other side of your paper, they are great for doodling and using in personal planners.


Because this notebook will probably travel in my laptop bag when not in my desk drawer, I needed to shut it tight and recycled the elastic bow from my April 2013 EcoEmi gift box. It works perfectly as a closure.

And since I was quite pleased with the results on this DIY project, I went ahead and covered the remaining two notebooks:


Do not worry if you see the paper bubble up here and there (as you can see above), it will flatten back out on its own once it is completely dry.


Pretty easy don't you think? And so much more attractive than boring notebooks!
I hope you have enjoyed this quick step-by-step project. Thank you for liking and sharing my blog with family and friends.
Sophia, NJ
You can find me on FACEBOOK and YOUTUBE
*This site contains affiliate advertising. I am not affiliate with Barnes and Noble, Piccadilly, Moleskine or LePen by Uchida. All opinions are my own.
I am back with an easy DIY project!
Having too much time on my hands and plenty Mod Podge leftover, I have decided to put some of my extra scrapbooking paper to good use.
Last week I purchased a new (and very much needed) laptop and also decided to keep a small notebook to jot down passwords, tips and other PC setup steps we should all have on hand whenever we become PC challenged. So I went to my local Barnes and Noble, where I apparently am a known permanent fixture, and purchased a set of three small notebooks at $5.98 for a pack of three. I really wanted to buy the Moleskine brand, but they are just too expensive (though also coming in a 3-pack). Moleskine has fabulously smooth paper which is great for fast note takers like me, however, their pack is almost $20.00! Piccadilly, however, offers a very similar product, available in the bargain section. The paper is the same ruled cream color, only not as smooth but still of very good quality.


For this project, you will need the following items:
- Mod Podge
- A medium size brush
- Tape
- Scrapbooking paper in assorted themes and colors (12 x 12). You will need two sheets per notebook - one for the outer cover and a matching or different one for the inside of the flap.
- Scissors
For my PC notebook, I picked scrapbooking paper in assorted animal prints. I planned on using the Zebra pattern for the outer cover and the Cheetah pattern for the inner flap. I had purchased these quite a long time ago and they no longer have the stickers on the back so I apologize if I am not able to tell you about the brand(s).

First, I placed my notebook directly on top of the scrapbook sheet (face down).

Fold the paper in half making a slight crease at the spine. The sheet of paper should be equally distributed on both sides

Fold the overhanging paper to form a flap against the edges of the notebook. Repeat on the other side.

Fold and form a corner with the top portion of the paper. Press hard to form a good crease, just like you would with Origami.

To split the paper at the top and form the top and bottom flaps, I simply cut a triangle shape out of the upper and lover portions of the paper. Be careful to stop your scissors exactly where the notebook begins.

Fold the top flap over.

Use the scissors to cut excess paper and ensure that the flaps are all the same size.

I used tape to secure my flaps before moving on to the other side of the notebook. Be careful not to press too hard on the tape itself as it is only there to temporarily hold the flaps onto the cover. You do not want to damage your paper in the process of removing the tape afterwards.

Once I had all my creases marked, I removed the tape and careful unfolded the paper out of the notebook.

Using my brush, I covered the entire surface of the notebook outer cover with Mod Podge...

And pressed my paper cover back into position, ensuring that all the paper was in contact with the glue.

Using the same brush and Mod Podge, I adhered the flaps onto the inner cover of the notebook, going under and making sure that I had plenty Mod Podge under and over the corners as well. Do not hesitate to apply pressure wherever needed when you see the paper coming off the cover.

Fold the notebook back into a closed position and let the Mod Podge dry (about 15-20 minutes).

For the inner cover, I cut a piece of scrapbook paper in a matching theme and color, slightly smaller than the cover itself so that the Zebra pattern could still be seen along the edges.

Using my brush and more Mod Podge, I glued the inner cover in place.

More drying time....Once the paper is dry it is time to cover the entire surface of both the inner and outer covers with more Mod Podge.

Below, I used the back of a chair to let the notebook dry. Doing it this way allowed for both the inner and outer covers to dry simultaneously.

Once your notebook is completely dry, you will notice that it has become a bit stiff. No worries, simply bend it back and forth to bring back some flexibility to the cover, it will not crack and eventually your notebook will lay flat again.
This is what my final project looks like:
I have used coordinating paint chips from the Home Depot to create tabs which I secured with transparent tape on both sides. Thus far, I have a tab for PC Setup and one for Password.s But I plan on using another one for OneNote (a software I will use but need to learn), Excel Tricks and tips, and another for troubleshooting.

Using my non bleeding LePen pens, I decorated the front page with some colorful paisley doodles. I love LePen pens, you can find them at Michael's and other craft stores. They absolutely will not bleed or show on the other side of your paper, they are great for doodling and using in personal planners.


Because this notebook will probably travel in my laptop bag when not in my desk drawer, I needed to shut it tight and recycled the elastic bow from my April 2013 EcoEmi gift box. It works perfectly as a closure.

And since I was quite pleased with the results on this DIY project, I went ahead and covered the remaining two notebooks:

Do not worry if you see the paper bubble up here and there (as you can see above), it will flatten back out on its own once it is completely dry.


Pretty easy don't you think? And so much more attractive than boring notebooks!
I hope you have enjoyed this quick step-by-step project. Thank you for liking and sharing my blog with family and friends.
Sophia, NJ
You can find me on FACEBOOK and YOUTUBE
*This site contains affiliate advertising. I am not affiliate with Barnes and Noble, Piccadilly, Moleskine or LePen by Uchida. All opinions are my own.
This looks great - has the new cover held up? did the mod podge soak thru enough to protect the outside or do you suggest mod podging the outside of the new cover too? thank you.
ReplyDeleteThis looks great - has the new cover held up? did the mod podge soak thru enough to protect the outside or do you suggest mod podging the outside of the new cover too? thank you.
ReplyDelete