Wednesday, August 29, 2012

Packing List - Week End Getaway


Dear MGC readers,

The traveling season is upon us. Whether you are planning a trip to visit family over Labor Day, Thanksgiving or Christmas this year, you know all too well that packing can be a stressful affair.

You either pack too much or not enough, pack the wrong things or forget the essentials. How many times have you left the house only to return for the camera's charger or had to stop half way through your destination to purchase a bottle of Tums?

I have been there myself, and with two boys in tow, we not only have to pack for ourselves, we also need to pack for them, all the time maintening full time jobs! No wonder folks need a vacation to rest from their vacation!

So, to make things easier for everybody, starting with me this year, I made these two packing check lists. I think they pretty much cover everything you might need for a week end getaway or 4 days away from home (2 days travel, 2 days visiting). The first sheet includes a His and Hers packing check list as well as responsibilities before leaving. At the bottom of the sheet I have included all items which need to be packed specifically for the car.

The second sheet includes all that is needed when traveling with children including what you should keep in the car to keep your little ones entertained! I realize not everyone has children under two, but I still included the Diaper/Bottles check box to the list, to cover all the bases!

You may want to click on the printable to view a larger (readable) version. Click on the links to download.


Week End Packing List


 Children Packing list


As with all my other printables, these are FREE and yours to use at will. However, please be kind and provide the original link or mention My Great Challenge as the source should you wish to blog or vlog about them.
Thank you, and Bon Voyage!
Sophia, NJ.

Tuesday, August 21, 2012

Pesto you can freeze

Hi y'all,

MGC reader Bea, from Tassot Apiaries is sending us this awesome pesto recipe. If you get a chance, do check out Tassot 's shop and website, they have by far the best raw honey and honey products I have tried. You can also read about it from my earlier post Support Your Local Farmers.


So what is pesto anyway?

Here is the always oh so reliable definition from Wikipedia.org:

"Pesto (Italian pronunciation: [ˈpesto], Genoese: [ˈpestu]) is a sauce originating in Genoa in the Liguria region of northern Italy (pesto genovese),[1] and traditionally consists of crushed garlic, basil, and European pine nuts blended with olive oil, Parmigiano Reggiano (parmesan cheese), and Fiore Sardo (cheese made from sheep's milk).[2] The name is the contracted past participle of the Genoese word pestâ (Italian: pestare), which means to pound, to crush, in reference to the original method of preparation, with marble mortar and wooden pestle. However, the ingredients in a traditionally made pesto are not "pounded" but "ground" with a circular motion of the pestle in the mortar."


What can you do with pesto?

Traditionally, pesto is used on pasta and can sometimes be called a green sauce. It is rather potent as a taste and a little goes a long way, but most folks love the taste (and crunchiness) of pesto, so you may see a lot of it on a Linguine dish. My husband uses it as a base for pizza instead of tomato sauce. it is delicious as a condiment over a steak or a boiled potato...the possibilities are really endless, if you like the taste of basil and garlic, you are in for a treat.

What do you need?


  • 3 cups packed of Basil, all kinds, purple and green
  • 1/4 Pinoli nuts or walnuts
  • 4 cloves of garlic
  • 1/2 cup olive oil (the darker and thicker variety)
  • 3/4 cup Parmiginao Regiano (I would recommend you buy a block and grate it yourself to ensure the best freshness)
This is more of a visual recipe than anything else, but it is so simple to make, it just makes sense by itself without much direction. Also, because Bea planned for freezing her pesto to use over the winter, she multiplied the quantities above by 8 (To make just about 8 cups):


Here Bea has gathered 3 full bunch of basil including one purple variety.
As you can see, some of her basil is already in bloom and that is
fine, making pesto is a great way to use all that leftover basil that
did not make it to the table on time.

Start separating your leaves and stems and throw away those leaves that
are not in a good shape, wilted or damaged.

Washing basil is just about as easy as washing lettuce, just let it soak in cold
water, either in a clean sink or a large bowl.

Do the same with the purple variety - No purple on hand? No worries, it
tastes just as good with all green!

Remove as much water as possible, you can also use a paper towel
to pat dry the leaves, just be careful not to bruise them.

Add three whole garlic heads, these are from Bea's farm in Milford, NJ. You
can tell they are fresh farmed garlic by the beard (roots) still hanging at the
base, your grocery store will clean that out for aesthetic purposes. Slice the
garlic cloves, they do not have to me minced.

In a stand mixer in the likes of Magimix, KitchenAid or Cuisinart, add the
basil first, then add your garlic, pinoli nuts, Parmesan and olive oil.

After mixing, it should look like this.

Pack your pesto in an air tight container and freeze! Voila!

Bea made 8 cups, that is a lot of delicious pesto and a great way to enjoy
your fresh basil all year long.

I wish I had a fresh steamy baguette right about now to dip in one of these bowls!
A big thank you to MGC reader, Bea from Milford, NJ. This is an awesome recipe and so simple to try!
If you have a recipe, organizational tip or how to you want to share with MGC readers, please join our Facebook page and message me your album and directions, or simply post on the wall.
Thank you all.
Bon appetit,
Sophia, NJ
Don't forget to visit Bea's Tassot Apiaries Web site...It is great fun and very informational!

Sunday, August 12, 2012

Link Parties Track Sheet - FREE template

Link Parties are a great way to reach more potential readers for your blog as well as to create an active network of other bloggers just like you.

I am not new to blogging but I am definitely new to Link Parties and though I have linked some of my posts on other sites, I already find it difficult to keep track of where I was featured and when. So I made this tracking sheet!


Link Parties Tracking Sheet


Here is how to use it:

Every time you publish a new post on your blog, immediately create a sheet with the name of that post (e.g. "DIY cosmetic bag" or " How I organized my shoe closet" (LOL, here's something I need to do).
One sheet per post.
Add the  publishing date.
Below, enter the date, site and category for each blog where you have linked your post.
For instance, I have featured my DIY Cosmetic Bag on the blog "Threading my Way".

So I would write in:

When: 8/12/12   Site: threadingmyway.blogspot.com   Category: Sewing-DIY


Why is it important to keep track of your link parties?

You do not want to link the same post twice on the same site. Further, the sheet is a reminder to link your posts and it also provides you with an at a glance list of blogs related to that particular topic.

Since I plan on writing more blogs about sewing, I will need to remember which link party blogs are "sewing" blogs. The tracking sheet from a previous sewing post will provide me with a quick list of where to link the new post!

All my templates and forms are free to use and reproduce. Be kind and mention my blog when referencing to this or any other template either on your own blog or youtube channel. Thank you.

Enjoy!

Sophia, NJ.

Family Central - FREE fridge or binder template

This is a good form to use under a plastic protection sheet to either use in a home management binder or on your fridge.
You can use dry erase markers (fine point) to write over the plastic sleeve and erase it all at the beginning of each new week.
I made this form to help us with the bigger reminders such as school trips, MD. appointments, when  to bring water shoes to daycare etc.
It also has a space for immediate needs, for instance if we need something from the grocery store than cannot wait until the week end shopping (e.g. milk or pet food).


Family Central - Fridge Template


To download the form just click on its title or this link.

This is a PDF and it prints in really nice warm fall colors. If you want additional colors, please don't hesitate to ask me, I love making these forms (or any form for that matter).

When referring to this or any other form or template I provide for free on MyGreatChallenge, please be kind and mention the website.

Thank you all,

Enjoy!

Saturday, August 11, 2012

Easy tomato sauce + canning instructions

You do not need to have a ton of tomatoes to make sauce, in fact, if you have a small garden, you may just have enough to make sauce for two meals at a time or can two jars at a time. This is my case.
This year, we found ourselves slightly overrun with tomatoes and not wanting to throw them away, I have decided to can them, one small batch at a time.
So of course this blog post will tell you how to do that but really you do not have to can/jar your sauce afterwards, you can enjoy it right away! I just wanted to give canning a try and thought blogging about it could be neat as well.
So here goes for the ingredients:


  • Tomatoes of various sizes and varieties
  • 1 large onion
  • 1 whole garlic
  • 1 eggplant (I only used one instead of the two shown on the picture)
  • Fresh herbs - here I have fennel, basil and chives
  • Olive oil, salt and pepper.

Making tomato sauce (or gravy as some Italian families call it) is not complicated, there are different methods however as to the preparation, for instance, some folks would puree all the ingredients first, then cook them as a sauce while others would cook all the ingredients first, then puree them to make the sauce.
This is the later, in which I cooked all my ingredients in a large pot first and later pureed them before canning. I really cannot tell you whether one is better than the other, perhaps readers can leave comments below this post and compare notes as to which is best.

STEP ONE:

Chop your garlic and add to a large pot where the Olive Oil has been brought to temperature. The garlic should bubble under the heat. You do not have to use a lot of oil, in this case I have about 3 tablespoons.


Once the garlic has taken a bit of a golden color, add the chopped onions...


Let the onions soften under the heated oil, stirring occasionally, then add the cubed eggplant...


Stir occasionally and once the mix become very fragrant, add your tomatoes, again, I only sliced the larger varieties, cherry tomatoes went in as is...


After a few minutes, add the herbs all chopped into small sections, but not too small, for instance I kept the fennel stalks at about 3/4 in. size.


Add your salt and pepper to taste. You can also add crushed pepper flakes if you wish. It is important to add a little bit of salt at that stage as it will help the tomatoes lose some of their juice. For that reason, you do not need to add water to the pot!


In this picture below, you can see that I really do not have a lot of ingredients as I only planned on making two jars of sauce.


Stir all the ingredients one more time, cover and let the pot simmer for 3.5 to 4 hours under very low heat. It is best to use a tight lid.

STEP TWO:


While the pot was simmering I went and fetched a few empty glass jars I had around the house. I found these two:


You can tell that they are leftover jars from tomato sauce we had purchased at the store. Well, I am all about recycling, so the first order of business was to remove the labels...I soaked the jars in hot soapy water for a good 20 minutes and the labels came right off.


Once you have "almost brand new" jars, you need to think about sterilizing them which is just about the same process you would use to sterilize baby bottles:

Plunge your jars into boiling water, turning them around and making sure all surfaces are exposed, then turn off the heat and cover. Let the jars sit in the steam for at least 10 minutes (don't forget to throw the lids in the water as well).


Remove the jars from the water using a kitchen utensil such as a tong and make sure you never directly touch them with your hands.


Meanwhile, the tomato sauce is ready to be pureed!


Step Three:


Setting the pot aside, you can either puree your ingredients using a hand mixer or a manual "moulinette" which is another one of my French manual food mill.
Whichever you use, make sure you remove as much liquid as you can first, unless you want a watery sauce.


Here I am using my French food Mill from the Martha Stewart collection.

Once the sauce is pureed and ready for canning, carefully pour it (one ladle at a time) into the jars. Remember never to touch the inside of the jars, or the lids with your bare hands. Always use utensils that are cleaned and sterilized.


Here I managed to make one full jar (right) and 3/4 of the larger one (left). I planned on using the large one first.

Now that that the tomato sauce is canned, it needs to be vacuumed sealed and sterilized again. The best way to do that is to let the jars sit in a few inches of boiling water, cover the pot, turn off the heat and let the jars stand in the steam for at least 20 minutes. This process will vacuum seal the lids and prepare the jars for a longer shelf life. I really could not tell you how long of a shelf life, but I have seen my grandmother do this exact same process for her canning and we have enjoyed vegetables and sauces years after their original canning time!


We ate the sauce from the large jar first because it was not full. The other jar has been labeled and placed on a shelf in the basement with the rest of my store bought tomato sauces. I have to say that none of them compare to this homemade sauce. It was relatively easy to make and so much richer in taste and flavor, not to mention healthier!


I am hoping you found this post informative as well as inspiring. I really think that we all should take advantage of whatever little plot of land we have to grow our own organic food! There is no sugar added nor preservatives when you can your own food and if you live in an apartment, nothing stops you from canning the food you buy from the store - recycle your jars!

Thank you for "liking" and "sharing" this post and MyGreatChallenge Facebook page!

Cheers,


DIY Cosmetic Bag - Purse Organizer

Look at all this junk I carry around! And that is only one part of the contents of my purse!


We have this thing in the family for Ziploc bags which we use as purse organizers! I am so sick of using them I have decided to be a tad more with the times and upgrade to the real deal! Here we have my daily assortment of medications which I must take with me. Notice the big improvement from one of my original posts on MGC where I had to take over 12 of them daily!
Here we have a great hand cream (Carmex Healing Lotion), a Hand Sanitizer for when I leave any store, my French refreshing mints, a Sally Hansen Collagen treatment lip balm (a must) and of course the meds with a coupon for my next Spiriva purchase.

Because I really could not find anything I liked in the stores, not to mention the asking price for what I did actually like, I have decided to use some of my leftover quilting fabric and make my own cosmetic bag/purse organizer. In essence, since I have used all recycled items or items I already  had on hand, this project cost me nothing, other than time of course, and it was a whole day project for me (but since I have no pretense as a seamstress or even a quilter, anyone with common sense and skills would knock this thing out in one afternoon!) Quilters beware, I do everything wrong (I am pretty sure of that!)

Here is what I used to make my cosmetic bag:


  • Two fat quarters in assorted designs/colors.
  • Quilter's batting (the synthetic kind)
  • A leftover Gros-Grain ribbon which had once wrapped a box of chocolates (still has the paper label attached to it). I keep all the ribbons that come to the house for future use such as scrapbooking or sewing projects.
  • Basic sewing kit includes, needle, threads, scissors, ruler and Velcro (I later opted for pressure snaps instead).


Here is the final project as a teaser:


I made side "souffles" and a flat bottom so that it
can stand on a table, if need be.


So here we go, I am going to try my best to give you all the instructions as I took pictures of pretty much all the steps in the process. The lighting may not be all that consistent, so as a result, colors will vary:

First I had to remind myself to iron the fat quarters. This is a dreaded task for me as I simply hate ironing. However, everything I know about sewing I taught myself through trial and error, and if you are new to this, my advice is IRON FIRST!


Once the fabric was ironed, I laid it flat and trimmed where needed (I have learned not to trust the store's measurements) and sure enough my two fat quarters were not identical. A fat quarter is supposed to measure 18' x 22'.


Once trimmed to identical sides, I folded the fabric in half (lengthwise) and cut along the fold. This gave me two sets of matching fabrics (9x22). I then decided which combination was best for my bag (dark cover/light lining or Light outer cover/darker lining).


I chose to keep the darker fabric for the outer cover (left side). Originally I was going to make a second bag using the reverse fabric but quickly realized I needed fabric for the souffles and the binding...


Time to add the padding and quilt the two pieces together!

I cut a single layer of quilter's batting and placed it in between the two layers of fabric...


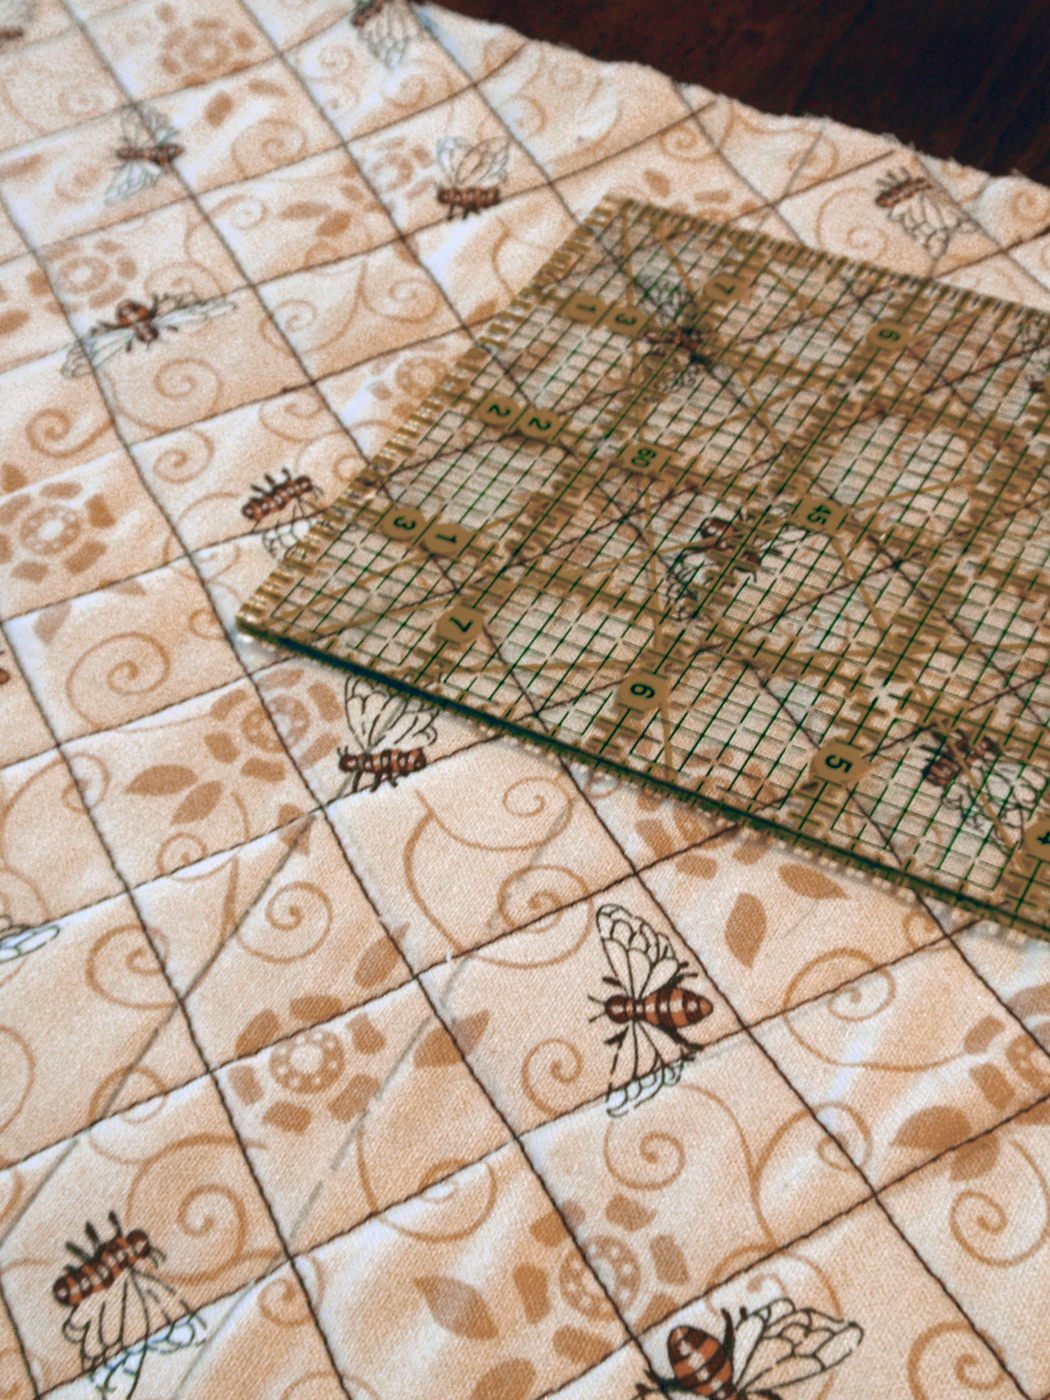
With my quilter's ruler, I lined the lighter fabric using a pencil and created a crisscross pattern with parallel bands, 1 inch apart...Note that though it does not show in the pictures, the bands are not parallel to the edge of the fabric, I marked them in diagonal instead.


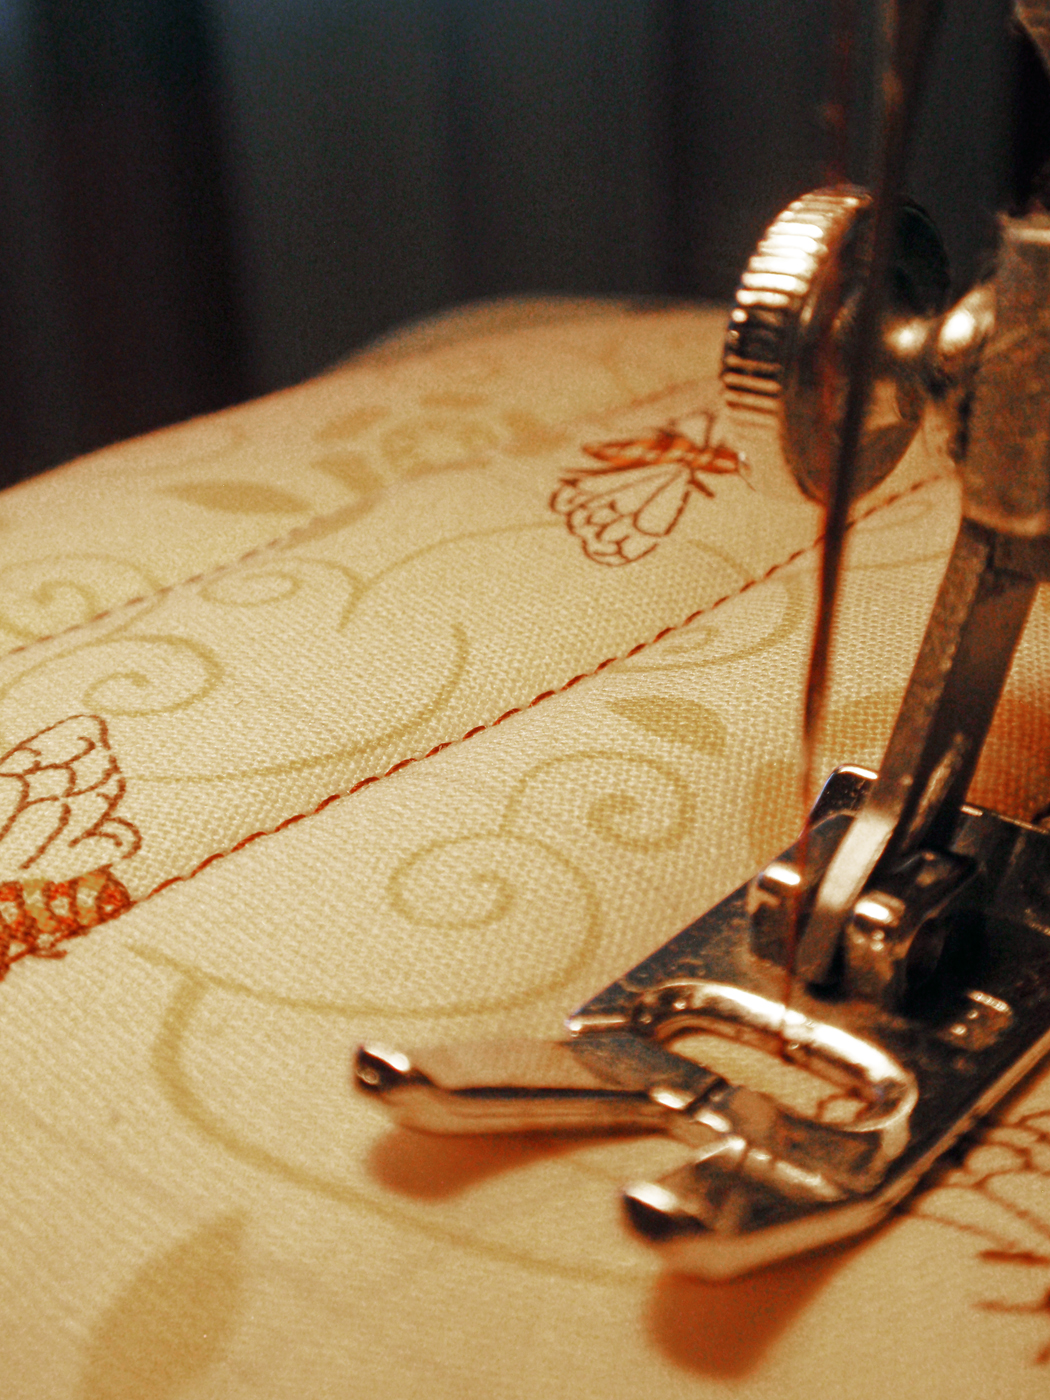
Using a straight stitch in a contrasting color (dark brown) I just went ahead and went over each line with my sewing machine. That was, by far, the hardest and longest task in this project. Remember to use pins to secure your layers together, otherwise your fabric will slide off and the result will be awful (I have learned the hard way).


Here is the quilting once completed...I think you can see the diagonal work better in this picture. Trim again, if needed, along the edges or where the batting may have been stretched.


To create the flat bottom for my cosmetic bag, I measured exactly 6 inches from the bottom of the fabric and made two lines, 1 inch apart (one at 6 in. and the other at 7 in. from the bottom) then used the machine to sew over with the same contrasting thread.


This is how I made the side "souffles" (I really do not know what they are called in English, so I apologize for that, it is pronounced sou-flay in French). Tell you what, let's just call them "extensions"!

I first cut two strips 2.5 in. wide of the same fabric...


Placing them right side out, I just went ahead and used the zigzag stitch all around...


I then hand stitched the bands along the side of my cosmetic bag...Leaving whatever was extra at the top, it can be trimmed later...


Here is the view from the inside of the bag...


On to the binding. If you do not know how to prepare a bias tape for binding, check out this post from an earlier project of mine: DIY iPad cover.

One thing I have learned is that binding is very tricky and unless you know how to sew well (which is not the case here) you probably will be better off doing it entirely by hand...And this is just what I did for this project, only because it was small enough. I also thought that for larger projects I would probably use the machine to sew one side of the binding to the quilt or fabric and then hand stitch the other side...Again, refer to my other post to learn how to make the bias tape.

Here is the binding, which I chose in the contrasting lighter fabric...


For the souffles extensions, I used the floral pattern and pretty much did the same thing, binding all around...


I then joined the top parts of the extensions together to reduce the width of the bag's opening: I did not want the bag to open to such a wide opening and by closing the top part of each sides it allows for the content/volume to remain the same while giving the bag a more structured look (I am hoping I am making sense here).


As mentioned earlier in this post, I originally thought of using Velcro for the enclosure, but later realized that I do not care for the sound of it, it is also a pain to sew on to pieces and it takes on all sorts of crumbs, dirt and what not when used a lot...Not very aesthetic to say the least! So I opted for pressure snaps instead and placed three on top of the flap.


As a final touch, I added the grosgrain ribbon to the front by stitching it right in the middle of the flap to make sure it would stay in place. Once the bow was made, I used a few stitches all around it to ensure all parts were secured to the flap. I did not want to have to retie the bow over and over.


Done!

Here is my cosmetic bag/purse organizer again, it is about 9 x 7 inches in size:


As you can see, all my loose stuff fits right in!


I like the design and the fabric, it has this retro 30s/40s look to it...


And to boot, it fits right into my everyday Vera Bradley (this is the Mandy design, but more on this and other purses in a later post!)


I am hoping you have liked this tutorial and that you were inspired to make yourself a similar cosmetic bag/purse organizer, it sure beats having junk all over, or better yet, a Ziploc pouch (I am officially Ziploc free! Yeah!)

Thanks for sharing and liking my post and blog on Facebook!


Related Posts Plugin for WordPress, Blogger...
Pin It button on image hover