DOG GATE 101
1. Wake husband up at wee hours of a Saturday morning (preferably one with good weather ahead)
2. Gather your tools - which in this case clear up the garage area around the saw table.
3. Trip to The Home Depot where lumber is found in multiple varieties of cheapness and durability - pick cheap and semi-durable.
4. Return home only to realize essential tools are missing - drive back to The Home Depot.
5. Measure once, cut twice...wait! That did not sound right...Measure twice, cut once! (Wear goggles)
6. Install, curse some.
7. Strip a few deck screws, curse some more.
8. Return to The Home Depot for more deck screws and driver bits.
9. Level and finish with ill fitting hardware - return to Home Depot to purchase better fitting hardware.
10. Enjoy second biggest project (first one was the porch railing) handmade from start to finish by hipster and Martha (that's us)...begin dreaming of more projects.
Here is the visual version of our Dog Gate experiment...
 |
| The before |
Before Scott realized he had a mini Bob Villa trapped inside of him this is what our deck dog gate looked like...Notice that since the gate is too short it is precariously holding on to one side of the house and some piece of wood we found in the garage.
 |
So when you walked up towards the deck, you pretty much were faced with this beauty you would either have to climb over or kick open, depending on the mood. Mad attractive isn't it?
 |
The first step was to figure out where we wanted the two posts. the issue is that the house stops
before the deck railing, therefore one post would lean on the railing while the other (on the right) would have to be a stand alone....
 |
 |
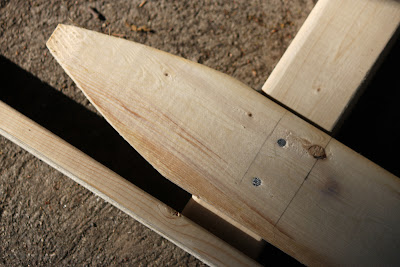
| Drill on the side of the posts as well |
We found this table circular saw (complete) at a garage sale last year...$90! What a steal, this is the first time Scott gets to use it!
 |
| Measure twice - cut once! (preferred method) |
 |
| Woo hoo! Check him out - action shot! |
 |
| Here, Scott is trying to figure out where to put the pickets and how many we would need. |
 |
| Nail them in... |
 |
| oops, measuring twice... |
 |
| Start by placing two on either side and one in the middle - measure equal distances in between. |
 |
| I think he's eye balling...As evidenced by absence of measuring tape. |
 |
| Attach the hardware... |
And VOILA! New Dog Gate!
 |
| Total cost? Under $60. |
 |
| Keeping the dogs on the deck? Priceless! |


I think youve made some truly interesting points. Not too many people would actually think about this the way you just did. Im really impressed that theres so much about this subject thats been uncovered and you did it so well, with so much class. Good one you, man! Really great stuff here. pet gates and baby gates
ReplyDeleteThe new gate looks much better compared to the old one because it matches your deck. The wreath is a nice touch; it made the gate look inviting, unlike other dog gates that usually look threatening. Dog gates are really necessary so your pooches can remain secure and protected when you’re not around. Two thumbs up for the project’s success. :)
ReplyDeleteEllan Lima