
Here is a little something I made over the past week...
But first, let me make sure that we are all on the same page: this is My Great Challenge where I try desperately to create stuff and organize my life. I have no pretense to claim myself as a seamstress and this post is proof. I can sew on a straight line, most of the time, I have made curtains and drapes, but my skills as it turns out when it comes to sewing are very limited to say the least. And that is alright with me, plain and simple, this is SEWING FOR THE REST OF US, the Needle Challenged and the ones who like to fool around with a Fat Quarter here and there. Those like me will appreciate the initiative and effort ( I hope). And for those of you who can actually sew, here are a few things I need to say:
1. I admire and envy you.
2. I wish I had the time to take classes and really learn to make my own clothes.
3. Feel free to pass this around the web as hilarious examples of below standard stitchery.
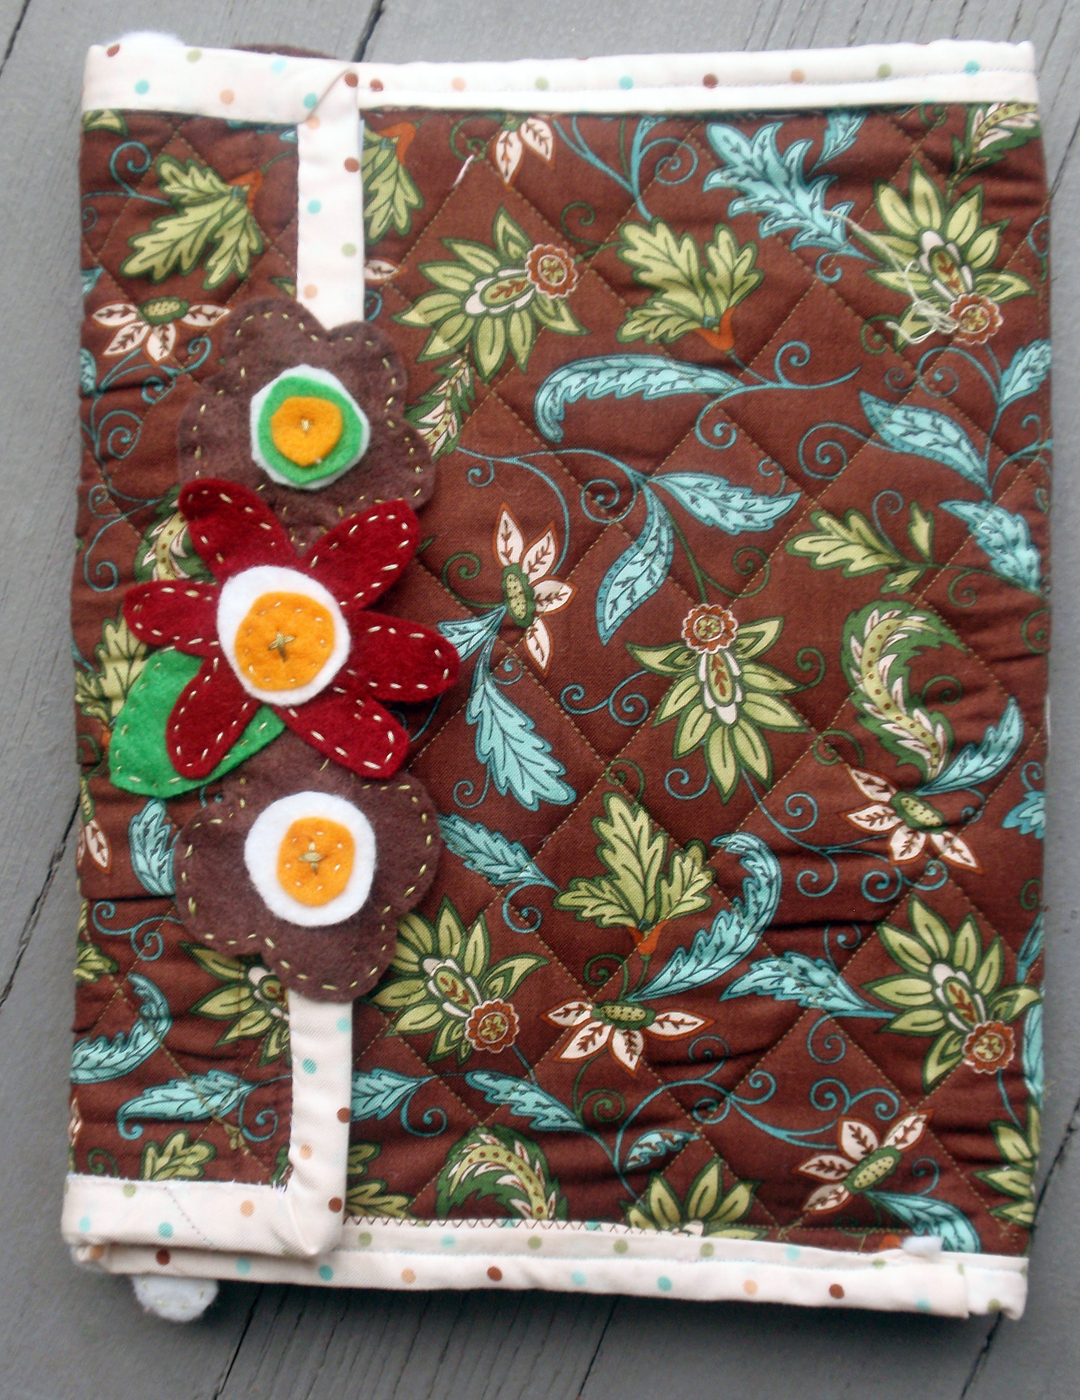
So here it is...My iPad cover. I quilted it and made it as a wrap around, it is attached with Velcro.

 |
| Side view where you can see the iPad tucked in and protected by the padding. |
 |
| I made some decorative flowers out of felt, did not have the right combination of colors, but tried to match the overall look of the cover fabric. |
 |
| On the inside, I made a pocket where I tuck in a piece of felt to clean the screen out. There is enough room for a small memo pad as well. |
 |
| Here is the inside, where the iPad is held in place. |
 |
| A close up of detail work. |
Here are the supplies:

I used 4 Fat Quarters part of the same collection. These were a gift from my Mother- in- Law (so is the iPad - how spoiled am I? Very spoiled!) at a time I was really involved with quilting (which I plan on doing more of - Do stand by for more ridiculous attempts at pressing that Singer foot pedal!)

I also had some felt and buttons. I have never worked with felt and thought it would be a good addition.
First I ironed then cut the fabric to size...In this case I measured 21 x 11.5 (I later trimmed to fit).

I then added two layers of quilt batting (wanting to make sure the iPad would be well protected).

I then Quilted the layers together - I had to remember to release some of the tension on the thread as well as the length of stitches otherwise it was tugging and the thread would break.

Once I had my shell ready, I made small fabric bands (2 in. wide - double sided) to hold the iPad in place. I am showing them to you in the contrasting fabric so you can actually see them against the lining.

I placed two on top (one for each corner) in diagonal - note that one will be a tad longer (1/4 in.) than the other, to allow the iPad to slide in.

At the bottom, I use the band as a pocket and rounded the corners for a snug fit.

This is how I stitched the corner tabs.

Once all three where sewn into place, I had Scott hold the entire cover to see whether the iPad was truly secured in the pocket and held by the two tabs...Awesome fit!

I knew I would need to hide the edges of the tabs, so I create a strip of contrasting fabric to cover the extra fabric off the center of the cover (the sides would later be covered by the binding).

Now I wish I had done a better job on that strip of fabric, for instance, I could have folded the edges and stitched right along, rather than leaving the zigzags in plain sight. Live and learn! Here it is once it covers the upper tabs.

Next I made a pocket for the other side of the lining.

It fits large envelopes...

The binding was the hardest to do and I am not ashamed to say I ended up doing it three times over! First it was crooked, then I realized I was better off using a lighter thread to avoid making all the flaws more apparent, then I realized the corners where also crooked and loose...Anyway, it took a while and this is really not the best example of binding you will ever see, but I tried and that's all that matters for now.
So to bind the entire piece together I made this bias tape (I think that's what it is called) out of fabric.
First I cut long bands 2 in. wide.

Once the bands were cut, I had to assemble them in a chain, to make one long strip of fabric. To do that I placed the one at the bottom right side up and the one on top, right side down (kissing right on right). I stitched right across in a diagonal.

Cut off the excess fabric...

And flipped it over - here they are, perfectly joined.

With the iron, I pressed the edges together towards the center to make the folds...

Then folded the ribbon in half and pressed again with the iron to crease the fold.

Here I am binding the cover with the bias tape I just made.

Here is a corner, they always look best in their before stage!

Since I had messed up the corners, I chose to hide my obvious lack of skills by adding felt flowers on top!

This is what it looks like when the two corners are covered...

Originally I was going to use a large button as an enclosure but realized that it could actually damage the screen if pressure was applied to the cover...So I opted for the dreaded Velcro instead! And that was another challenge for me, not so much for placement, but how to sew it in place without ruining previous work...Guess how many times I had to redo the task? (Let's just say it was three too many!)
Well, this is not the greatest picture, but you can see how I placed the Velcro inside the flap and on top of the cover to allow for a flap over closure.

I made additional felt flowers for the front cover and voila! Here it is again:
Through this ordeal I have learned a few things:
1. Patience is Queen
2. Speed is King (as in slow...slower...very slow)
3. I have regained a bit of self esteem because I did see a project to its completion. It may not be perfect, but it is unique, there are not two like this one, and ...
4. This project made me want to do more...Motivation comes from practice I guess!
This was a feel good project. If you can sew a straight line, you can do this, trust me, it does require patience but in the end, I have a quilted iPad cover like no one else!
Let me know what you think.
Sophia, NJ.


